
How to Install Your Graphics Card (GPU)
Some builds ship with the GPU packed separately to protect the PCIe slot during transit. Follow the video above and the steps below — you’ll be up and running fast.
-
No special tools (usually) Most installs are just a couple screws + power connectors.
-
Beginner-friendly & safe We’ll show exactly where the GPU goes and what “fully seated” looks like.
-
Works for NVIDIA & AMD GeForce and Radeon cards follow the same basic install steps.
Quick safety checklist
Do this first (takes 30 seconds):
- Shut down Windows fully
- Flip the PSU switch to 0
- Unplug the power cable
- Hold the case power button for 5 seconds
- Touch bare metal on the case to reduce static
What you should have
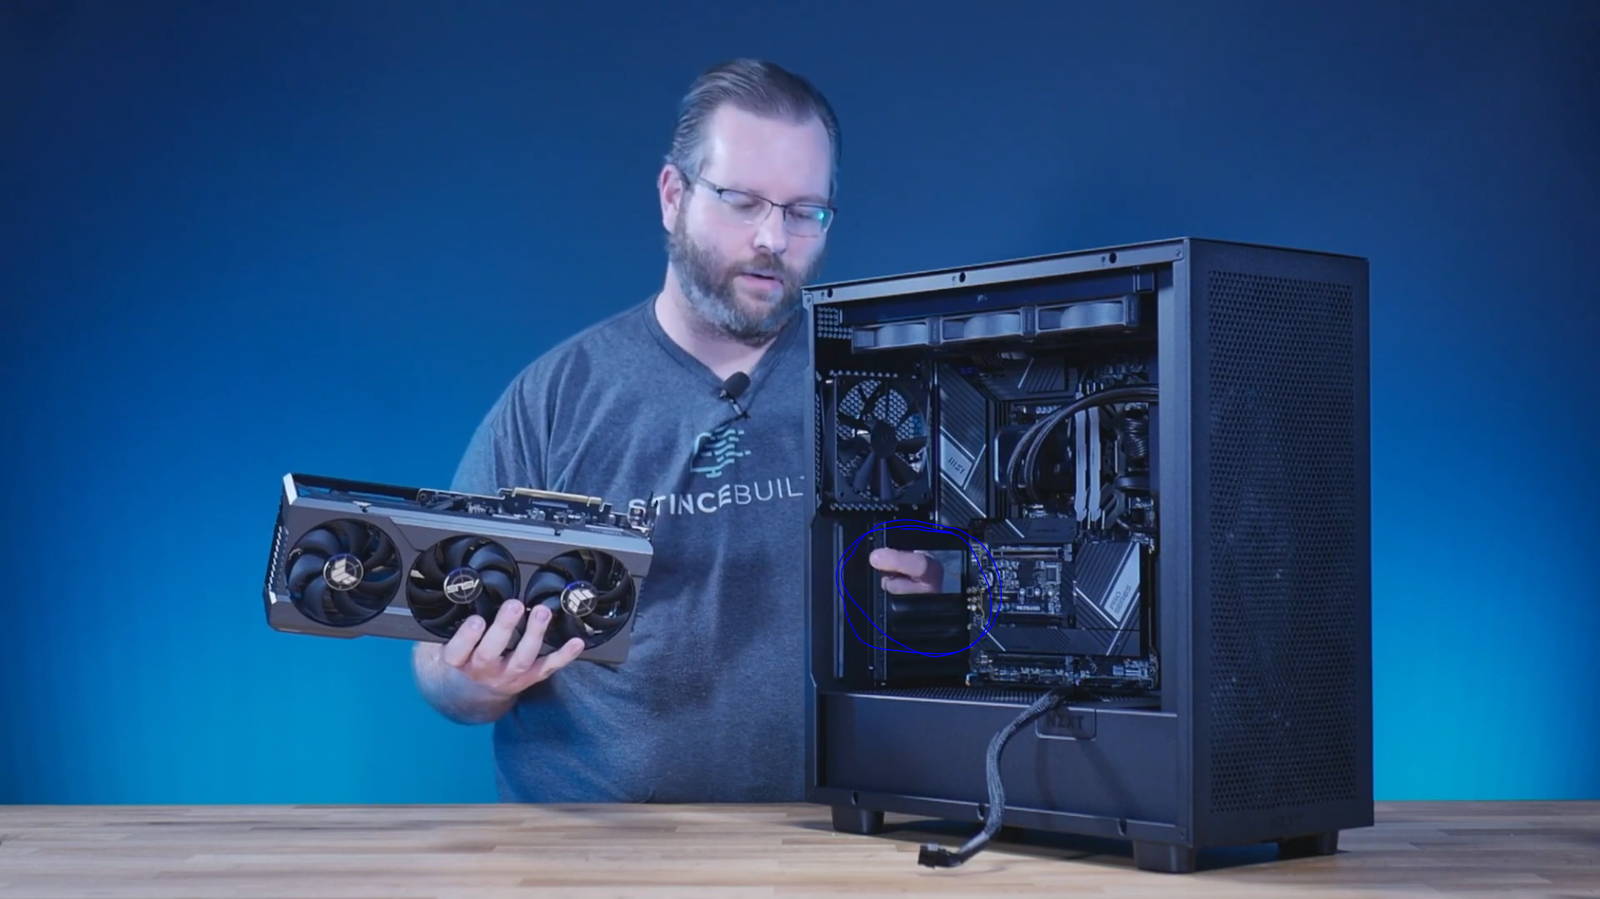
Your GPU (graphics card / video card)
Remove any plastic covers on the gold connector or ports before installing.
Case thumbscrews / side panel screws
You’ll remove the side panel and rear slot covers (usually 2–3).
PCIe power cables
6-pin / 8-pin / 12VHPWR depending on your card. Make sure they fully click in.
(Optional) Support bracket / adapter
Some GPUs include a bracket or power adapter — install if needed.
Pro tip: If you’re unsure which slot to use, pick the top full-length PCIe x16 slot closest to the CPU.
Step-by-step GPU installation (with images)
Use the video above, then follow these quick steps. Replace the image URLs below with stills pulled from the video.
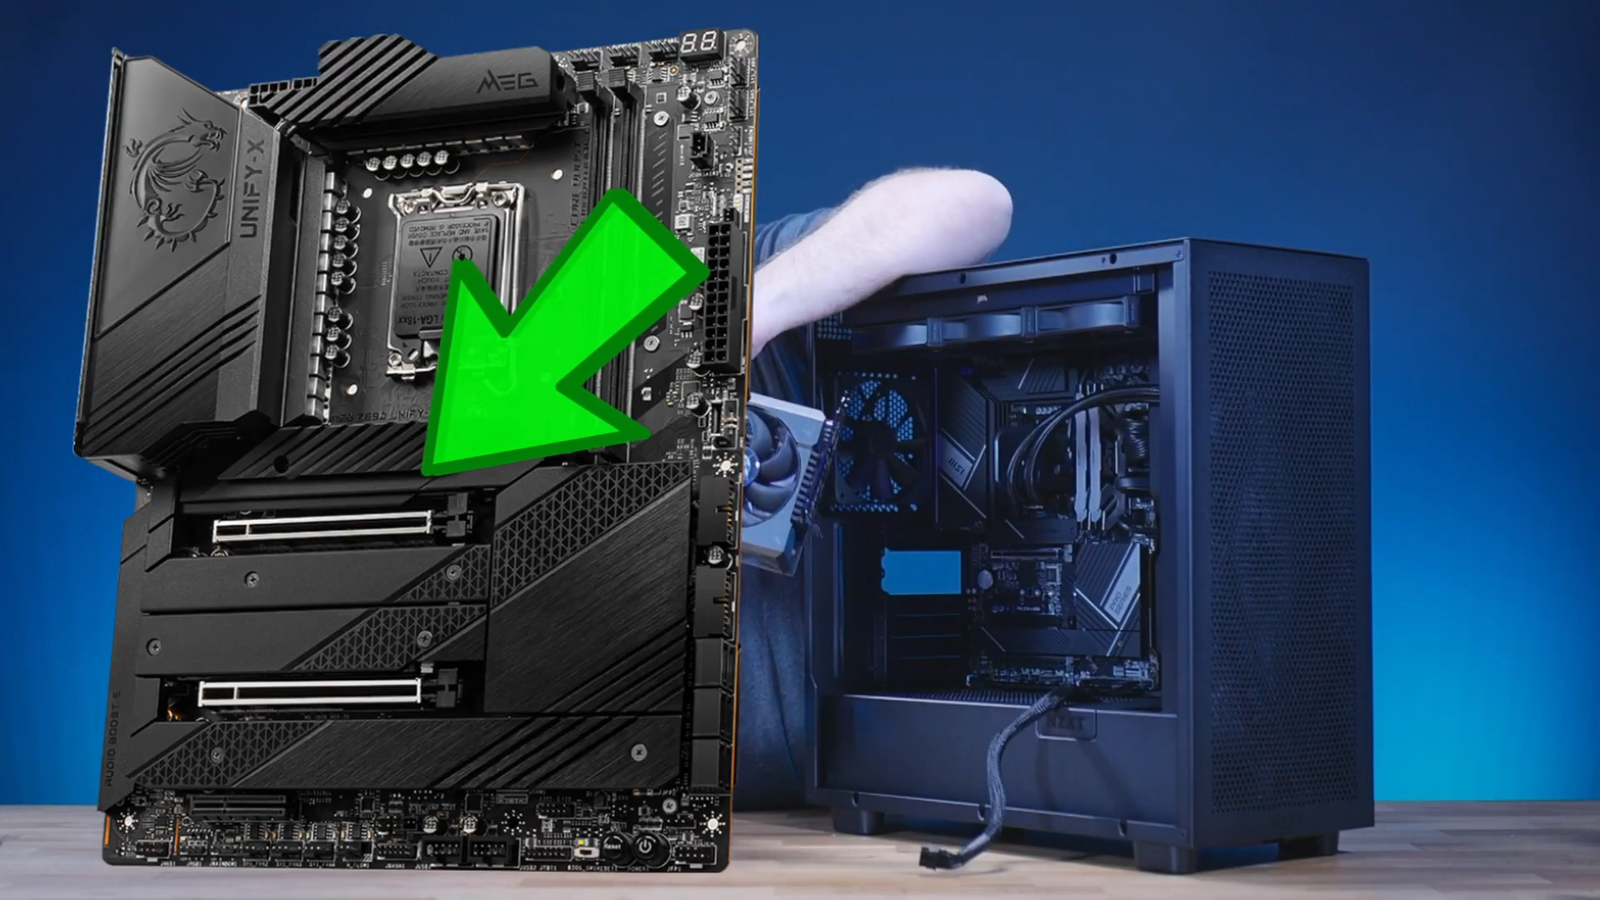
Open the case & find the PCIe x16 slot
Remove the side panel. Find the long PCIe slot on the motherboard — typically the top full-length slot closest to the CPU.
Remove the rear slot covers
Most GPUs use 2–3 slots. Unscrew and remove the matching covers at the back of the case.

Seat the GPU until it clicks
Align the GPU with the slot and press straight down. You should feel/hear a click when the PCIe latch locks.
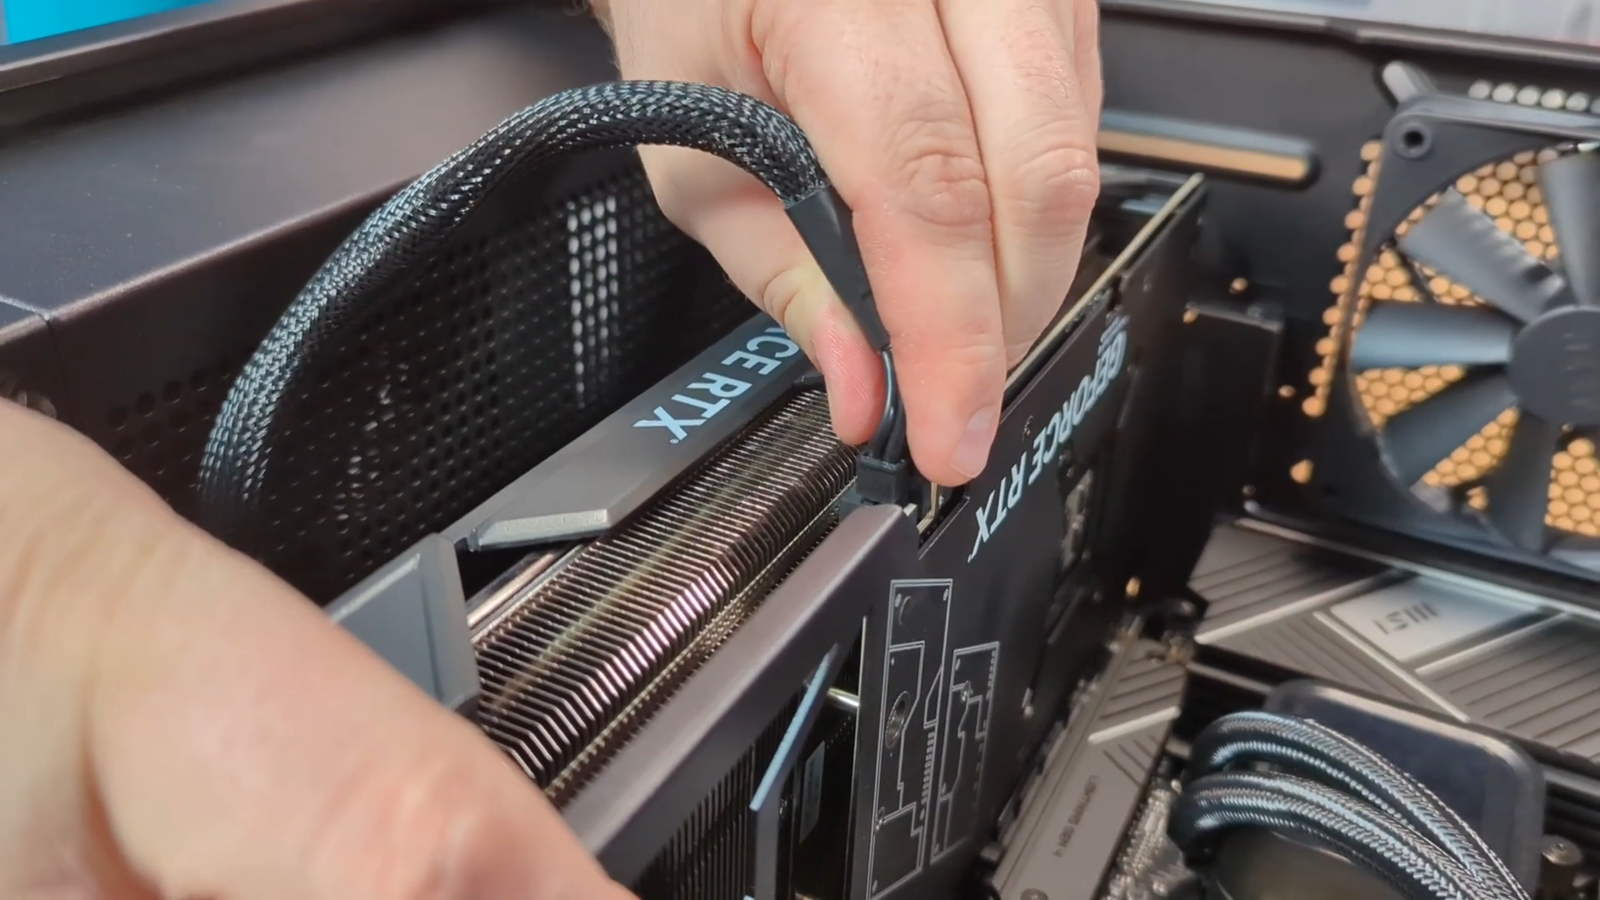
Connect PCIe power & final check
Connect the required GPU power (6/8-pin or 12VHPWR). Make sure it’s fully seated, then reinstall the side panel and power on.
Troubleshooting (quick fixes)
If something doesn’t look right after installation, these solve most issues in under a minute.
Note: If your GPU uses a 12VHPWR connector, ensure it’s fully inserted and avoid sharp bends near the plug.
FAQ
Do I need to install drivers after installing my GPU?
NO, if this is a StinceBuilt.com systems, drivers are pre-installed for you. IF you are building this system yourself, you will need to install the latest drivers.
Where should I plug my monitor in after installing the GPU?
Plug your display cable into the ports on the GPU (video card), not the motherboard I/O panel.
How do I know the GPU is fully installed?
The card sits level, the rear bracket lines up cleanly, screws tighten without forcing, and the PCIe latch locks/clicks.
What if my PC still won’t boot correctly?
Power down, re-seat the GPU and the power connectors, and try again. If you’re still stuck, contact us and we’ll help you get sorted.